File Storage Solutions
File Storage is the ideal solution for server backup

File Storage is the ideal solution for server backup

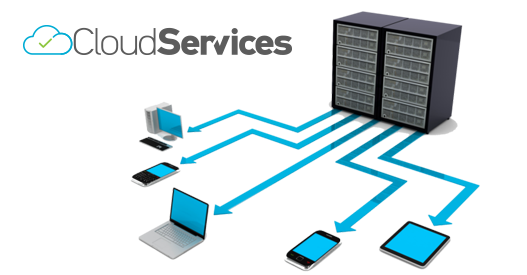
With File Storage, you can access your data on the go wherever you have internet access. File Storage can be used like an additional storage drive that you can conveniently access from your home PC, your smartphone, or your tablet.
File Storage is the ideal solution for server backup. Is compatible with cPanel and Plesk.
6,00€ /month
+16,00€ /month
+30,00€ /month
+50,00€ /month
+We guarantee our commitment to quality.

Easily save a copy of your photos, movies, music, email, and other important files in the cloud for safe keeping.

You can access your data via FTP, FTPS, SFTP, SCP, Samba/CIFS, BorgBackup, Restic, Rclone, rsync via SSH, HTTPS, WebDAV
You can even integrate your File Storage into your own file system via Webdav or Samba.

Transfer and store your files with 256-bit AES encryption. Samba/CIFS accessible on via VPN
| File Storage 1 TB | File Storage 5 TB | File Storage 10 TB | File Storage 20 TB | |
|---|---|---|---|---|
| Features | ||||
|
Available storage
|
1 TB | 5 TB | 10 TB | 20 TB |
|
Upgrade/Downgrade
|
✓ | ✓ | ✓ | ✓ |
|
Traffic
|
Unlimited | Unlimited | Unlimited | Unlimited |
|
Concurrent connections
|
10 | 10 | 10 | 10 |
|
FTP/FTPS
|
✓ | ✓ | ✓ | ✓ |
|
SFTP
|
✓ | ✓ | ✓ | ✓ |
|
SCP
|
✓ | ✓ | ✓ | ✓ |
|
BorgBackup
|
✓ | ✓ | ✓ | ✓ |
|
Restic
|
✓ | ✓ | ✓ | ✓ |
|
rsync via SSH
|
✓ | ✓ | ✓ | ✓ |
|
HTTPS
|
✓ | ✓ | ✓ | ✓ |
|
WebDAV
|
✓ | ✓ | ✓ | ✓ |
|
Useable as network drive
|
✓ | ✓ | ✓ | ✓ |
|
Storage location
|
DE | DE | DE | DE |
|
Free Email Support
|
✓ | ✓ | ✓ | ✓ |
| Pricing | ||||
|
Monthly
|
6.00€ | 16.00€ | 30.00€ | 50.00€ |
|
Setup Fee
|
Free | Free | Free | Free |
| Order | Order | Order | Order | |

All Cloud Services Store hosting services are backed by our pioneering Hosting Guarantee. This guarantee is a mark of the high quality you can expect from Cloud Services Store and underlines our commitment to providing excellence in our hosting division. Our Hosting Guarantee explains that we treat each service you have with Cloud Services Store individually. You can subscribe, modify or cancel any service you have with us at any time.


If you need to access an FTP server, you can install dedicated FTP clients with lots of features –but you don’t necessarily have to. Windows itself offers several ways for connecting to an FTP server, allowing you to download and upload files in a pinch.
The Windows file manager–known as File Explorer on Windows 10 and 8, and Windows Explorer on Windows 7–allows you to connect to FTP servers.
To connect to an FTP server, open a File Explorer or Windows Explorer window, click the “This PC” or “Computer”. Right-click in the right pane and select “Add a network location”.

Go through the wizard that appears and select “Choose a custom network location”.

In the “Specify the location of your website” dialog, enter the address of the ftp server in the form ftp://server.com .
For example, Microsoft’s FTP server is ftp.microsoft.com, so we’d enter ftp://ftp.microsoft.com here if we wanted to connect to that particular server.

If you don’t have a username and password, you can often check the “Log on anonymously” box and sign into the server without a username and password. This gives you limited access to the server–you can generally download publicly available files but not upload files, for example.
If you do have a username and password, enter your username here. The first time you connect to the FTP server, you’ll be prompted to enter your password.

You’ll now be asked to enter a name for the network location. Enter whatever name you like–the FTP site will appear with this name so you can easily remember which is which.

When you’re done, the FTP site will appear under “Network locations” in the This PC or Computer pane. Download files and upload files by copying and pasting them to and from this folder.

You can also do this with the ftp command in a Command Prompt window. This command is comes built into Windows.
To do this, open a Command Prompt window. On Windows 10 or 8, right-click the Start button or press Windows+X on your keyboard and select “Command Prompt”. On Windows 7, search the Start menu for “Command Prompt”.

Type ftp at the prompt and press Enter. The prompt will change to an ftp> prompt.
To connect to a server, type open followed by the address of the FTP server. For example, to connect to Microsoft’s FTP server, you’d type:
open ftp.microsoft.com
You’ll then be prompted for a username. Enter the username and password to connect to the site. If you don’t have one, you can enter “Anonymous” followed by a blank password to see if the FTP server allows anonymous access.

Once you’re connected, you can navigate the FTP server with the dir and cd commands. To view the contents of the current directory, type:
dir
To change to another directory, type the cd command followed by the name of the directory. For example, you’d type the following command to change to a directory named “example”:
cd example

To upload or download files, use the get and push commands.
For example, to download a file named example.txt in the current FTP folder, you’d type:
get example.txt
To upload a file stored on your desktop named example.txt to the FTP server, you’d type:
put "C:\Users\YOURNAME\Desktop\example.txt"

When you’re done, just type the following command and press Enter to close the connection:
quit

Mapping a shared network folder as a network drive is done using the “Map Network Drive” wizard. This wizard works the same in Windows 7 and Windows 8.x but it is started slightly differently in each operating system.
For example, in Windows 8.x you need to start File Explorer and go to This PC, then expand the Computer tab on the ribbon and click or tap “Map network drive”.

In Windows 7, start Windows Explorer and go to Computer. On the top toolbar you will see several buttons including one that says “Map network drive”. If you don’t see it, it means that there is insufficient space for displaying it and you need to maximize the Windows Explorer window.

The “Map Network Drive” wizard is now displayed. First, select the letter you want to assign to the drive you are about to map. Then, you need to select the shared network folder you want it to point to. You can directly type the path to it, if you know it. When typing the network path, you must start with “\\” followed by the name of the computer that is sharing the folder you want to map, followed by “\” and the name of the shared network folder. If you don’t really know these details, you can always click or tap “Browse”.

In the “Browse For Folder” window, browse through your network computers and expand the computer and select the folder you want to map and press “OK”.
Note, do not double-click on it as this may return an error saying that you don’t have access to it because you have not yet entered the credentials required to access it.

The network path to the selected folder is now displayed in the “Folder” entry. By default, Windows checks the box that says “Reconnect at sign-in”. This is to make sure that the drive you are about to map is used for all subsequent sign-ins. If you clear this box, the mapped resource will be used by Windows until you sign out from your user account and you will have to recreate it when you sign in again.
The next important setting says “Connect using different credentials”. This setting is disabled by default and it means that Windows will try to connect to the mapped drive using the user account and password from your computer. If this user account doesn’t exist on the computer sharing the selected folder, then you will have issues connecting to it. That is unless that folder is shared with the Homegroup or with the Everyone user group. In these scenarios you will be able to access the shared network folder.
If you need a refresher about the Homegroup and how it works, please read lesson 5.
If you want to use a specific user account and password to connect to the shared network folder and that user has permissions to access it, then check the “Connect using different credentials” setting.

When you are done configuring how you want to connect to the network drive, press “Finish”. If you enabled “Connect using different credentials”, the “Windows Security” window is shown, asking you to enter the user account and password it should use to connect to the network drive. If you did not enable this setting, Windows will try to connect to the network drive using the user account details from your computer.

In the Windows Security window it is very important that you pay attention to how you enter the credentials of the user account you are about to use.
In the “Username” field it is mandatory that you start by typing the name of the computer you will connect to. The name of this computer is mentioned in the line that says “Enter your credentials to connect to: Computer Name”. Simply type what you see there, followed by a “\” and then the user name you want to use.
If you are connecting to a Windows 8.x computer with a Microsoft account, type the e-mail address used by that account (for example: howtogeek@outlook.com or howtogeek@live.com). Then, in the “Password” field, type the password for that user account. If you want your credentials to be remembered, check the box that says “Remember my credentials”.
Note, we advise against doing that at first because you might make a mistake in typing the credentials, at least the first time you try things. If you are successful during the first connection, then, when you connect again to this drive mapping, Windows will display the Windows Security window again, asking for the same log in details. Then you can enter them and check this box so that you don’t have to enter the user credentials each time you use this drive mapping.
When done, press “OK”.

The drive mapping is now complete and an Explorer window is shown, displaying the contents of the shared network folder you just mapped.

The drive mapping is displayed in the “This PC” section of File Explorer (in Windows 8.x) or the Computer section of Windows Explorer (in Windows 7). All the mapped drives are shown under “Network Locations”.

Need help? We're always here for you.


